Saturday, March 19, 2022

How to add custom range method to apply range on View.

Hi All,
In this blog will learn how to add range method same as  SysQueryRangeUtil methods and apply on view.

Requirement - Add range in view to take only records up to last month ( Today() – days of current date)  i.e equal to up to last month transactions

Solution -  Create new class and add method according to the range and copy method attribute [QueryRangeFunction]

x++ Code
public static class TestVoyageClass
{
 [QueryRangeFunction]
public static str lessthanLastMonth()
{
int days ;
utcdatetime currentDateTime;
currentDateTime = DateTimeUtil::applyTimeZoneOffset(DateTimeUtil::getSystemDateTime(), DateTimeUtil::getUserPreferredTimeZone());
days = DateTimeUtil::day(currentDateTime)-1;
return SysQueryRangeUtil::lessThanDate(-days);
}
}
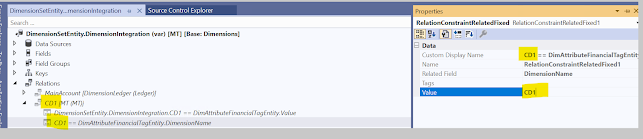
Add method name in range property of view. 


Thats It !!

How to ignore error in Finance and Operation


Dear  AX/D365FO Team,

Today we are going to learn how to ignore known errors in D365FO.
Recently I came to this situation where I have no choice rather than ignore the error and continue the build. So lets start and understand the situation when we need to ignore the errors.

Requirement : Show lookup in excel add-in for custom dimensions.


Solution :Add related field fix relation with string value (dimensions name).Normally this is not allowed in D365FO but we can achieve this through ignore error functionality. 

Development :
As you can see in below screen CD1 is my string value in related field fix relation, x++ is not allowing you to create related field fix relation on the basis of string values. To achieve this I have used ignore error functionality.


Steps to ignore Error-
1) After making such changes start building of your model.
    once you complete your model build you will get one error file generated in below path 

2) Next you need to rename it as CompileError.xml
and change first Tag name of xml file from <Diagnostics></ Diagnostics > to <IgnoreDiagnostics> </IgnoreDiagnostics>

And keep this file in below location – and do the build.


3) Build the model again and check the result.

Error file format 

<Diagnostic>
<DiagnosticType>Metadata</DiagnosticType>
<Severity>Error</Severity>
<Path>AxDataEntityViewExtension/DimensionCombinationEntity.MT/Relations/CD1/Constraints/RelationConstraintRelatedFixed1/RelatedField</Path>
<Moniker>FieldTypeIsEnumOrInt</Moniker>
<Message>Field type must be enum, int, or int64.</Message>
</Diagnostic>
<Diagnostic>
<DiagnosticType>Metadata</DiagnosticType>
<Severity>Error</Severity>
<Path>AxDataEntityViewExtension/DimensionCombinationEntity.MT/Relations/CD1/Constraints/RelationConstraintRelatedFixed1/Value</Path>
<Moniker>RelationConstraintValueStrMalformed</Moniker>
<Message>The value must be an integer or the enum value in the format: &lt;enumname&gt;::&lt;enumvaluename&gt;.</Message>
</Diagnostic>


How to show all standard + custom dimensions in excel add-in D365 FO

Hello All,
Today we are going to learn how to show all dimensions in Excel add-in. As per the standard functionality we can able to see all dimensions in one column in display value. and Main account is showing in different column, Recently i got requirement to show all dimensions in separate column and i achieved this in very simple way with the help of below link.

Link - https://docs.microsoft.com/en-us/dynamics365/fin-ops-core/dev-itpro/financial/dimensions-overview

In this blog we are going with step by step process.

Step 1 :

Open Microsoft Visual Studio, click Dynamics 365 > Addins > Add financial dimensions for Odata.


Step 2:
Type the name of the Financial dimension in the Dimension name column. This should be the exact name of the financial dimensions. Select the Model that has your extensions (custom model which you have created) and click Apply.

Note - Please don't select Dimensions model, otherwise you will face error in build and Deployment.

PS - In my case I already selected my custom model so that it is not showing dimension lookup before apply button. 


You must keep the extension name "DimensionIntegration" for the project to work properly.

Step 3 :

Compile the project, and then synchronize it with the database.

Step 4:

Your customization is now completed. You can test it in SQL using the following statement.
You can validate in SQL using below query it should show you new dimensions.

select * from DIMENSIONCOMBINATIONENTITY

Step 5 : 

With below blog you can create lookup for your dimensions in Excel- addin.

https://community.dynamics.com/365/financeandoperations/b/rkblog/posts/d365fo-enable-lookup-dimensions-in-excel-add_2d00_in-for-standard-and-custom-dimensions


-------------------------------------------------xxx-------------------------------------------------------------------

Thanks & Regards,
Vijay Yelmame
Senior Technical consultant D365FO
Vijay.Yelmame2019@outlook.com

Post partial packing slip in D365FO

How to Post a Partial Packing Slip in D365FO and AX 2012 How to Post a Partial Packing Slip in D365FO and AX 2012 Understanding t...